The post Mini Trampoline Fitness – The Benefits of Rebounding appeared first on Like Ah Trini.
]]>Rebounding as an exercise has a long history, with roots tracing back centuries to when Eskimos used animal skins for bouncing and springing.
The modern form of the trampoline, which is the basis for rebounding, was invented in the 1930s by George Nissen. He devised the idea while observing trapeze artists who used safety nets to do tricks. Nissen thought of creating a similar device that could provide a safe and fun way to exercise and perform acrobatics.
Years later with the help of his coach Larry Griswold, he was able to patent his ‘tumbling device‘ which eventually became known as a trampoline after the Spanish word ‘trampolin‘ which means springboard or diving board.
Since then, trampolines and rebounding exercises have evolved gaining popularity as effective ways to stay fit and healthy.

What is Rebounding?
In simple terms, rebounding refers to exercise that is done by bouncing on a trampoline.
What is The Difference between a Rebounder and a Trampoline?
A rebounder is a mini trampoline specifically designed for fitness and rehabilitation. Rebounders are usually closer to the ground, more compact (typically 3 to 5 feet in diameter) and are meant to accommodate only one person. On the other hand, a trampoline can be larger, accommodating several persons at once and is generally used for fun and recreation.
What Are Some of the Benefits of Rebounding With a Mini Trampoline?
Not only is rebounding fun and energising, but it also offers a range of health benefits.
A study published by NASA in the Journal of Applied Physiology in 1980 focused on the benefits of rebounding for astronauts to counteract the negative effect of prolonged weightlessness on their bones and muscles. The study showed that rebounding is an effective exercise for maintaining bone density and muscle strength.
Weight Loss
Exercising on a rebounder engages the entire body, elevating the heart rate and leading to calorie burning. It involves using large muscle groups, boosting the metabolism over time and encouraging calorie burning even at rest.
Low Impact Workout
Rebounding is a low-impact form of exercise as there are no jarring movements on the floor. This reduces stress on the joints and lowers the risk of strain and injury, while still providing an effective workout.
Consistency
Bouncing up and down is an enjoyable activity…just ask children.
Many adults find that exercising on a mini trampoline makes workouts fun rather than feeling like a chore. They start looking forward to their daily exercise, making it a habit and an easy way to incorporate daily movement into their lives. Consistency coupled with healthy eating, is key when it comes to weight loss. So put on your favourite movie, podcast or playlist and start moving!
Improved Blood Circulation
Bouncing exercises are great for the cardiovascular system as they increase the heart rate and oxygen uptake often comparable to, and in some cases, better than, other forms of cardio exercise.
This dynamic motion circulates blood throughout the body and pumps oxygen-rich blood to various organs. Enhanced circulation means that cells receive oxygen more efficiently leading to enhanced energy levels, brain function, better metabolism and immune system support, among other benefits.
Detoxifying the Lymphatic System
Rebounding may help flush out the lymphatic system. a vital part of toxin removal and immune system health. Unlike the circulatory system, which circulates blood via the heart, the lymphatic system lacks a pump and relies on movement for circulation. This is where rebounding becomes beneficial.
Bouncing on a mini trampoline opens and closes the one-way valves in the lymphatic system promoting the flow of lymph. This helps to transport waste, toxins and pathogens where they can be filtered and eliminated from the body.
Builds Bones and Joints
Rebounding is a bodyweight-bearing activity which plays an essential part in improving bone density. The stimulation of bone cells encourages the growth of new bone tissue making it effective against osteoporosis and age-related bone loss.
For joint health, the bouncing movements contribute to the distribution of the fluid that cushions the joints resulting in reduced friction and smoother movement. Also, these movements strengthen the muscles that provide support to the joints.
Core Strength
A hidden bonus of using a mini trampoline is the gradually increasing core strength. With each joyful bounce your abdominal muscles are engaged to maintain balance, steadiness and controlled movements. Over time, these muscles become stronger and more resilient.
Relieving Depression, Improving Mental Health and Stress Relief
In our fast-paced world, rebounding offers a valuable self-care opportunity and a means to alleviate stress contributing to mental well-being. It effectively relieves tension, acting like a massage for the entire body.
The motions resemble the bouncing and shaking movement in the ancient practice of Qigong, where it is used to disperse stagnant energy and reduce bodily stress.
Rebounding triggers the release of endorphins often referred to as the ‘feel-good’ hormones. These endorphins can uplift your mood, alleviate mild depression and anxiety and provide an outlet for pent-up frustrations and distracting from daily concerns.

Better Skin and Hair
Rebounding isn’t solely for weight loss – it surprisingly extends its benefits to your skin and hair.
The act of rebounding can actually stimulate collagen production. Collagen a crucial protein abundant in our bodies plays a pivotal role in our skin, bones, tendons and other connective tissues. For our skin, it is responsible for maintaining elasticity and suppleness.
It has been shown that stress can negatively impact collagen and consequently, skin health. This can manifest as wrinkles and premature signs of aging. Lower stress levels can potentially improve skin issues such as acne, psoriasis and eczema.
Rebounding enhances blood flow bringing oxygen to the skin. Improved lymph circulation helps get rid of toxins and contributes to clearer skin.
Furthermore, the combination of detoxification, improved circulation and potential weight loss has been associated with reducing the appearance of cellulite. Studies have shown that there is a link between the accumulation of lymph due to a stagnant lymphatic system and cellulite. Stimulation of the lymphatic system helps to redistribute fluid buildup potentially decreasing the appearance of cellulite.
As for the hair, with improved circulation, essential nutrients can effectively reach the hair follicles promoting healthier and shinier hair while also encouraging growth. Many of us have experienced hair loss during high-stress periods. Therefore reduced stress through rebounding may foster better hair growth and maintenance.
Convenient
The mini trampoline occupies very little space and can be used almost anywhere – whether it’s your bedroom, living room, porch or backyard. This makes it suitable for working out in small apartments or with limited room. Plus you are not at the mercy of the weather – you can get a full-body workout indoors.
Time-efficient
Surprisingly, a rebounding workout as short as 10 minutes can be as effective as 20 minutes of jogging.
Family-friendly fun
Rebounding is not just for individuals, it’s a workout that the entire family can enjoy. Its adaptable intensity suits both beginners and advanced exercisers and since it’s low-impact it is gentler on joints.
Today an array of online videos, apps and virtual classes make it easier than ever to work out on your mini trampoline in the comfort of your home.
Variety
Beyond the basic bounce, there is a myriad of other exercises that can be performed on a rebounder, such as:
- Running in place
- Jumping jacks
- Side-to-side skiing
- Jump squats
- High knee lifts
In addition, you can incorporate light hand weights into your workouts for upper body toning.
What to Look For When Selecting A Mini Trampoline
When on the hunt for a mini trampoline for your rebounding adventures, there are several important factors to consider.
Size and Space – Start by assessing the trampoline’s size. Opt for one that provides ample bouncing area for your needs while still fitting comfortably within your available space.
Weight Capacity – Mini trampolines have varying weight limits, based on their design. It is essential to confirm the maximum weight capacity to ensure it suits your weight or that of your family members.
Stability – Look for a trampoline with non-slip feet to prevent it from shifting while in use.
Solid Frame – Prioritize trampolines that have frames made out of durable materials like steel.
Portability – If you plan to frequently move the trampoline, consider a foldable model for easy transport and storage.
Adjustable Handlebar– Some mini trampolines feature an adjustable handlebar. This is beneficial, especially for beginners, the elderly or anyone requiring additional support and stability during workouts.
Good Reviews – It is advisable to read a range of reviews to gauge customer satisfaction, providing insights into the trampoline’s potential strengths and limitations.
Resources and References
For more information on the benefits of using a mini trampoline, see the following links:
- Effects of a mini-trampoline rebounding exercise program on functional parameters, body composition and quality of life in overweight women.
- Effects of rebound exercises on overweight and obese adults: A scoping review
- Body acceleration distribution and O2 uptake in humans during running and jumping
Conclusion
Wrapping up our exploration of rebounding on a mini trampoline, it’s clear that this is more than just a workout – it’s a gateway to a healthier lifestyle. The benefits are as exciting as they are varied, promising a holistic approach to fitness. And don’t let its simplicity fool you – this exercise is suitable for everyone, regardless of age or fitness level.
When you’re ready to take the leap into rebounding, keep in mind the pointers for selecting the right mini trampoline for your needs.
If you’re already a seasoned bouncer, feel free to share your rebounding experiences in the comments.
Disclaimer: The information provided in this article is for educational and informational purposes only. It is not a substitute for professional medical advice, diagnosis, or treatment. Always consult with a qualified healthcare provider before starting any new exercise program or making changes to your existing routine.
Image Credit:Image by prostooleh on Freepik

The post Mini Trampoline Fitness – The Benefits of Rebounding appeared first on Like Ah Trini.
]]>The post How To Keep Your Bathroom Floor Dry appeared first on Like Ah Trini.
]]>Growing up in Trinidad in the 1980s, things were a bit different back then. Our family shower was in an enclosure outdoors with a wooden pallet on concrete that quickly dried in the sunshine. Now, our homes have evolved and we mostly have slick tiled surfaces in indoor bathrooms.
Not only can a wet bathroom lead to slipping accidents, but it can also be a breeding ground for mould and mildew which has been shown to cause adverse health effects such as asthma. Paying attention to this is especially important for the safety and well-being of our children or older family members.
Here are ten tips you can implement to help keep your bathroom floor dry and maintain a clean safe space.
1. Use Bathroom Floor Mats and Rugs
Bathroom rugs and mats are a convenient solution for maintaining a dry bathroom floor. Some of the common rugs on the market are made from highly absorbent microfiber material that can quickly soak up water and help to keep the floor dry. Ensure that it has non-slip backing which will keep it stable and prevent them from sliding.
Sourcing rugs that are durable yet machine washable is a must to keep them clean and hygienic and can withstand regular use. There are many available in various colours and sizes to match your decor and space.
2. Install a Shower Curtain
If your shower has an enclosure with a door, then the obvious solution is to close the door when showering to avoid water splashing outside of the enclosure.
If, however, this is not an option the next best alternative is to install a shower curtain. A shower curtain can not only be a beautiful accessory to add to the aesthetic of the bathroom, but they play a considerable role in keeping the water contained in the shower area.
When searching for a shower curtain, ensure that it is waterproof or water-repellant to prevent water from soaking through. Easy to install and remove as well as easy to clean and maintain. Also, make sure that the size is appropriate for your shower area.
Make sure to keep the shower curtain closed during showers to prevent water from splashing onto the floor.
3. Keep Bath Towels Nearby
Try to place your towels as near as possible to the shower or bath for easy access. This allows you to dry off quickly after the shower without having to walk a distance to get the towel, leaving a trail of water behind you. Not to mention that this helps to save time and can get you feeling warm sooner as stepping out of the shower can leave you feeling cold.
4. Dry Off in The Shower
Especially with young children who may be anxious to run out of the bath, taking a few minutes to remove as much water off the body as possible before stepping out of the shower will certainly help to keep the bathroom floor dry. This simple practice not only minimizes water drips and trails, but also instils good habits in children regarding bathroom cleanliness and safety. Teaching them about the potential hazards of a wet floor and the importance of drying off can go a long way in creating a hygienic and accident-free bathroom environment. And, as mentioned before, keeping the towel nearby will make this whole process easier, ensuring a smooth transition from bath time to dry floors.
5. Use a Shower Caddy
Use a shower caddy to store your shampoo, conditioner, shower gels, and other bathroom essentials making them easily accessible. This not only helps you avoid stepping out of the shower if you’ve forgotten a product, but also prevents water from pooling up under the bottles if on the floor.
Stainless steel caddies tend to be durable and resistant to rust, which are suitable for the humid bathroom environment. They also prevent the growth of mould and mildew and are also easy to clean and maintain.
6. Squeegee Shower Doors
Particularly if your shower stall is made out of glass or acrylic it is a good idea to invest in a squeegee and incorporate the habit of using it to quickly remove excess water after each shower. This simple practice can yield significant benefits, especially when it comes to maintaining a dry bathroom floor.
Shower stalls with glass or acrylic doors can be prone to water spots and droplets after showers. These water remnants, if left unattended, can easily end up on the bathroom floor when the door is opened, contributing to unwanted wetness. By keeping a squeegee handy and dedicating a mere few seconds to swipe the water off the door and walls, you not only prevent water from spilling onto the floor but also eliminate the potential for water stains and residue buildup on your shower surfaces.
When selecting a squeegee, opt for one with a comfortable grip and a high-quality rubber blade that efficiently clears the water. Keep it within arm’s reach in the shower for easy access.
7. Use a Shower Splash Guard
A shower splash guard is a smart and practical solution to tackle the issue of water spilling in your bathroom. These simple accessories act as a barrier, stopping water from escaping your shower or bathtub onto your bathroom floor.
Splash guards are designed to work with your shower curtain, keeping it snug against the shower walls. This prevents splashes and spills, ensuring water stays where it should and avoiding wet floors. They’re versatile too, fitting both showers and bathtubs and made from waterproof materials to withstand water exposure. Installing them is easy, as many models have simple setups.
Cleaning them is a breeze as well– a quick wipe or rinse keeps them in good shape. These guards team up with your shower curtain to prevent leaks and add tidiness to your bathroom. So, if you want an easy way to keep water where it belongs, consider adding a shower splash guard to your bathroom setup.
8. Keep the Bathroom Well-Ventilated
Keeping the bathroom well-ventilated is crucial to dissipating moisture and maintaining a dry bathroom floor. Also, proper ventilation helps to avoid water damage and build-up of mould and mildew that thrive in a damp environment. It will help to improve the air quality and remove unpleasant odours.
If your bathroom has an exhaust fan, turn it on during and after showers or baths. Allow it to run for a few minutes after showering to draw out moist air. Some exhaust fans come with a sensor that automatically switches them on or off depending on the humidity level.
If you have windows, open them to allow fresh air to circulate and assist in dissipating moisture.
9. Use A Dehumidifier
In bathrooms with poor ventilation, a dehumidifier can be an option to decrease moisture and keep the floor and other surfaces dry.
In a nutshell, a dehumidifier works by drawing moist air into it through a vent and passing this air over cold coils. This causes the water in the air to condense and drip down into a catchment container. The dry air is then reheated and released back into the air.
They are usually easy to operate and can be quiet and energy-efficient. Always consider the size of the space in which it is to be used before purchasing a dehumidifier.
10. Keep The Bathroom Clean
I always admired my dad’s penchant for keeping an immaculate bathroom; he was an absolute boss at keeping surfaces dry after use. This is definitely one habit that can help to remove excess water and moisture in the bathroom.
Regularly clean and wipe down bathroom surfaces and dry any wet spots on the floor promptly. This will also help to keep the bathroom clean and hygienic. An absorbent mop can be used or floor towels which can later be added to the wash for easy cleanup. If using ordinary towels, it is best to keep towels for cleaning the bathroom separate from towels to dry the body.
In conclusion, maintaining a dry bathroom floor isn’t just about aesthetics; it’s about creating a safe, comfortable, and hygienic space for everyone in the household. From using absorbent mats and shower curtains to incorporating simple habits like squeegeeing and proper ventilation, these practical tips can make a substantial difference in preventing water-related accidents and maintaining the overall cleanliness of your bathroom.
Remember, it’s the small, consistent efforts that often yield the most significant results. By following these strategies, you’re not only enhancing the functionality and safety of your bathroom but also ensuring a more pleasant and worry-free experience for you and your loved ones. So, let’s embrace these practices and step onto dry, comfortable bathroom floors every day!
What are your favourite tips for keeping your bathroom clean and dry? Let us know in the comments.
The post How To Keep Your Bathroom Floor Dry appeared first on Like Ah Trini.
]]>The post Why You Should Add More Sardines to Your Diet appeared first on Like Ah Trini.
]]>They may be small, but they pack a big dose of nutrition and have been a part of our Trinbagonian and Caribbean culinary tradition for generations. Sardines are available fresh, canned, or frozen, making them a convenient and affordable option for adding healthy and delicious seafood to your meals.
In this post, we’ll explore the health benefits of sardines and how you can incorporate them into your menu.
What Are Sardines?
Sardines usually refer to small, silver, oily fish in the herring family. The name is believed to have originated from the island of Sardinia, one of the regions of Italy where these fish were found in abundance.

They not only serve as a delicious culinary delight but also have a practical use during times of disasters to provide relief to victims of devastation. You can stock up on sardines as part of your disaster preparedness plan, as the canned version has a long shelf life, is portable, and can be eaten straight from the can, providing a good source of nutrition when needed.
Benefits of Sardines for Your Health
Rich in Omega-3 Fatty Acids
Sardines are a wonderful source of omega-3 fatty acids, which have been shown to protect the heart, reduce inflammation, lower LDL (bad) cholesterol, and boost brain function. The healthy fats they contain also support mental clarity and health, which may have positive effects on mental well-being, fighting against depression and anxiety. Omega-3 fatty acids have been linked to potential anti-cancer benefits.
High in Protein
Protein is one of the macronutrients that we need in our diet as it is crucial for building and repairing tissues. Sardines are a powerhouse of high-quality protein and they contain all nine essential amino acids that our bodies need.
Contributes to the Health of the Bones
Calcium and vitamin D are both crucial for building and maintaining strong bones and teeth. Sardines are an excellent source of these essential nutrients. As we get older, it becomes increasingly important to take care of our bones and reduce the risk of osteoporosis, and sardines can play a vital role in supporting our bone health.
Rich in Vitamins and Minerals
Sardines contain essential vitamins and minerals such as vitamin D, B12, calcium, magnesium, iron, potassium, zinc, and the amino acids taurine and arginine.
May Help with Weight Loss
Sardines are relatively low in calories. One can of sardines in spring water contains 130 calories. Also, because they are high in protein and omega-3, they can improve metabolism and contribute to satiety, keeping you feeling fuller longer. This can help with unnecessary snacking and overeating.
Sardines Can be Part of Your Beauty Arsenal
Sardines can do wonders to improve your skin, hair, and nails.
Skin
Don’t worry, this has nothing to do with making a sardine mask and smearing it on your face.
Sardines are super beneficial for the skin due to their nutritional profile. The anti-inflammatory properties of the omega-3 fatty acids help to improve the appearance of the skin, while vitamin D and calcium promote skin cell regeneration.
Also being a good source of protein, sardines contribute essential amino acids vital to collagen production, which maintains elasticity and firmness.
Dermatologist Dr. Nicholas Perricone, the author of Ageless Face, Ageless Mind, believes in the power of anti-inflammatory foods and holds this fish in high esteem. He often emphasizes its role in obtaining smooth, supple, younger-looking skin.
Hair
Sardines are rich in Vitamin D3 and calcium, both of which promote hair growth and have even been shown to regrow hair in the case of alopecia.
According to Medical Hair Restoration:
“Adequate levels of vitamin D3 are essential for healthy hair growth, as it supports the growth and maintenance of hair follicles. One of the primary ways in which vitamin D3 promotes healthy hair growth is by improving the absorption of calcium. Calcium is an essential mineral required for the growth and maintenance of healthy hair.”
Nails
Sardines also contain an impressive amount of biotin, also called Vitamin B7. Not only is biotin good for the hair, but it also promotes healthy nail growth by strengthening the nails.
It Can Protect Against Type 2 Diabetes
A study published in the Clinical Nutrition, Journal in 2021 showed that consumption of sardines has a protective effect against type 2 diabetes.
Diana Díaz Rizzolo, who has a PhD in Biomedicine and is a university lecturer, stresses that sardines should be recommended by doctors, especially to patients over the age of 65 to prevent the onset of type 2 diabetes.
You can read her review of the benefits of sardine consumption here: Prevention of Type 2 Diabetes Through Sardines Consumption: An Integrative Review.
It is Sustainable
Sustainability is vital for our oceans, and sardines are more sustainable than many other types of seafood. These fish grow rapidly and can repopulate quickly, and fishing methods used to catch them do not cause significant damage to marine ecosystems.
Safer Choice of Fish
Due to their lower position on the food chain and shorter lifespan, sardines are considered a safer choice with lower levels of mercury and pollutants.
Inexpensive and Versatile
Compared to other oily fish like salmon, sardines are a more economical option, making them ideal for families on a budget. It is a nutrient-packed seafood that is easily accessible and can be added to a variety of recipes.
In our household growing up, I only knew sardines were prepared one way – we just called it ‘sardine’, now I know it as ‘Sardine Choka’. I remember it being a supper favourite with either roast bake or Crix with a cup of milky bush tea – that was a treat we all looked forward to.
Note: As with any dietary change, individuals with allergies or health conditions should consult their healthcare provider before adding new foods to their diet.
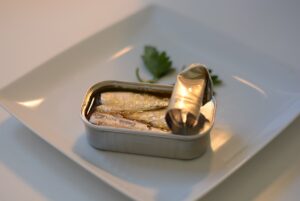
Sardine Choka Recipe
Ingredients:
- 2 cans of sardines, drained
- 1 small onion, finely chopped
- 2-3 cloves of garlic, minced
- 1 medium-sized tomato, diced
- 1 Scotch Bonnet pepper, finely chopped (optional)
- 1 pimento pepper, finely chopped
- 2 tablespoons oil
- Salt and black pepper to taste
- Fresh Shadon Beni leaves (culantro), finely chopped
- Lime or lemon juice
Instructions:
- Heat the oil in a frying pan over medium heat. Add the chopped onions and sauté until they become translucent.
- Stir in the minced garlic, pimento pepper, and hot pepper (if using) and cook for another minute or until the garlic becomes aromatic.
- Add the diced tomatoes to the pan and cook until they soften and release their juices.
- Now, it’s time to add the star of the show – the sardines! Break the sardines into smaller pieces with a fork as you add them to the pan.
- Gently stir and cook the fish with the onion, garlic, pimento and tomato mixture for a few minutes until everything is well combined and heated through.
- Season with salt and black pepper to taste. Remember that the sardines might already have some salt from the canning process, so adjust accordingly.
- Once everything is cooked and seasoned to perfection, remove the pan from the heat.
- Serve the choka on a platter or in individual bowls, garnishing with chopped shadon beni for some extra freshness and flavour. This can be eaten with crackers, warm roti, or steamed rice. Don’t forget to squeeze some lime or lemon juice over the choka just before eating – the tangy kick enhances the flavours!
How to Include Sardines in Your Family Menu
There are many ways to incorporate sardines into your menu. Other than the Sardine Choka recipe in this post, there are other creative ways to enjoy sardines. They can be included in recipes for:
- Fish Broth
- Salads
- Vegetable Stir Fries
- Tacos
- Pizza
- Pasta
- Fish Stews
- Sandwiches
Sardines are undoubtedly a nutritional powerhouse that brings both health benefits and a taste to our Caribbean dishes. With their omega-3 content, protein, and abundance of essential nutrients, sardines are an excellent addition to any diet.
Let us know in the comments, what are your favourite ways to prepare sardines?

The post Why You Should Add More Sardines to Your Diet appeared first on Like Ah Trini.
]]>The post 18 Food Tips for Weight Loss Like Ah Trini appeared first on Like Ah Trini.
]]>As a busy mom, I know how challenging it can sometimes be to prepare wholesome, nutritious home-cooked meals on a daily basis. Thankfully, there are tools that can make life easier and help to contribute to better meal preparation and weight loss. I’ve also learnt some tips along the way that greatly help to stay on track.
There are so many diets around, each claiming to be the best way to achieve weight loss and optimal health. At the end of the day, it’s about foods that are whole, a product of the Earth and as close as possible to their natural state. There should always be a good blend of vital macronutrients in meals – carbohydrates, protein and fat as well as micronutrients – vitamins and minerals.
According to the UK National Health Service (NHS), the recommended calorie intake for women is 2000 calories and for men, it is 2500.
In 2018, Trinidad and Tobago ranked 71st in the world on the list of countries by energy intake, at 2,991 average daily calories.
Weight loss occurs when the body is in a calorie deficit. This means that you need to consume fewer calories than you burn. If you are gaining weight, it means that you are eating more calories than you are burning.
Here are a few tips that may help with reducing calories.
Plan Meals and Grocery List in Advance
Meal planning is beneficial in that it can help to avoid bringing unhealthy foods into the home. It is really about being intentional about food purchases and therefore what you eat. Try to shop the aisles on the outskirts of the grocery store where the fresh products are housed. Also, it is good to support farmers in the local markets.
Another benefit is that it can help prevent food wastage when it is decided exactly what meals will be prepared during the week and purchase groceries accordingly. Meal planning saves money! Especially in this day and age where food prices are at an all-time high, you can save money by purchasing only what you need. In this way, you can keep an eye out for sales/discounts to help your dollar stretch further.
Some Foods Should Only Be Eaten as aTreat
I’m going to be a little controversial here, but I strongly believe ‘Doubles’ should be a treat if you need to achieve weight loss. You know, on the odd day when you don’t feel like making breakfast or just want to take the family to eat some hot doubles, you can indulge. I enjoy a well-prepared doubles with tasty hot channa, mango sauce and plenty pepper. My mouth waters just thinking about it. But doubles is not a friend if you want a slim waistline.

According to MyFitnessPal, one doubles has 345 calories and I hardly know anyone, including myself, who eats just one! Imagine consuming 700 to 1000 calories in a single meal, not to mention those who include their mandatory Apple J or Red Solo to wash it down. This is one such ‘meal’ that I believe should not be eaten on a daily basis, especially if losing weight is the objective. This can apply to many other foods.
It is okay to indulge in your favourite foods from time to time. It can even be encouraged to find balance, avoid feeling deprived and succumbing to binge eating. But it must be done mindfully and with intention. A good rule of thumb is to follow the 80/20 rule – eat healthy nutritious food 80% of the time and allow 20% for your favourite treats.
Decrease the Quantity of Carbs Consumed; Increase Vegetables and Salad
Most of us tend to eat a diet heavy in carbs. Roti, potato, rice, provision, bread, dumplings, and pasta, feature daily on most of our plates. A typical Sunday lunch can include three or more servings of starchy carbohydrates and can be very calorie-dense.
For weight loss, the composition of meals can include more salads and vegetables and fewer carbs. For example, instead of having rice and cornmeal coo-coo in the same meal, replace either the rice or the coo-coo with a serving of vegetables. Or, if you eat one cup of rice with your meal, add, for example, carrots and green beans to the rice, increasing the volume of vegetables, while reducing the amount of rice. This strategy can reduce calories without leaving you feeling hungry.

Eat Protein For Weight Loss
Protein digests slowly and helps with longer satiety which means it contributes to feeling fuller for a longer period of time.
A study was done on twenty healthy, young women to investigate the effect of high-protein meals on their appetite. The study showed that the women tended to snack less and subsequently ate fewer calories after consuming a high-protein meal.
Having protein with each meal can be a good way to avoid cravings and unnecessary grazing between meals. Some sources of protein are meats, seafood, dairy, legumes, nuts and beans.
Snack on Low-Calorie Foods Such as Popcorn and Cucumbers
I must admit, I never knew the benefits of plain popcorn in a weight loss journey until recently. Now, I don’t mean microwaved popcorn or popcorn cooked with butter and oil, but air-popped popcorn.
Popcorn is a whole grain that is high in fibre and low in fat and calories. Three cups of plain popcorn have only 93 calories. It is filling and healthy as it contains antioxidants, vitamins E, A, K, folate and riboflavin.
I used to think it was impossible to cook popcorn sans oil without some fancy air popper, but I found that the typical Trini iron pot with a heavy cover works just as well. Essentially, you turn on the heat under the pot, add an even single layer of popcorn kernels without oil, and cover the pot. Once you hear the first few kernels start to pop, give the pot a shake and then reduce the flame. When the popping slows down to about one pop per second, turn off the heat.
Season and salt to your taste (without added fats), serve and enjoy!
Cucumber chow is another option for a crunchy, filling snack. Most of us love a good chow. Cucumbers are loaded with water, vitamins, minerals and fibre, especially if you enjoy them with the skin on. One medium cucumber has only 30 calories so you can have some without feeling guilty.
Don’t Drink Your Calories
As humans, we really only need water for hydration. Yes, we can obtain vitamins and minerals from fruit juices and other beverages but we can get these from the food we eat. In addition, commercial beverages tend to be packed with sugar and/or artificial sweeteners which have been shown to contribute to diabetic conditions, obesity and food addictions.
Try to avoid drinking beverages with added sugar. Many of these are mostly empty calories that do nothing to satisfy the appetite and only add to the overall calories taken in for the day, which eventually leads to weight gain.
If coffee and tea are part of your diet, try having them without added sugar or artificial creamers which are mostly made of seed oils.
An occasional glass of mauby, coconut water, or lemon juice, once from natural sources is okay and can be beneficial. Avoid the commercial versions of these beverages – read your labels.
Drink Green Tea
Green tea is one of my guilty pleasures. I’m not sure when it happened, but at some point, it became a must-have with my breakfast. I adore a cup of unsweetened green tea and some of my favourites are Green Teas by Lipton and Green Tea and Ginger from Dilmah.

In addition to caffeine which has been shown to increase metabolism and fat burning, green tea has antioxidants called catechins which have an effect on body fat reduction.
It may also act as an appetite suppressant, thereby avoiding overconsumption of calories.
Intermittent Fasting For Weight Loss
Fasting has been around for thousands of years for health and religious purposes. Hippocrates, the father of modern medicine, recommended fasting for the health of his patients.
Intermittent fasting is abstaining from food for a period of time before eating. Not only does this help with calorie restriction but it also has been shown to contribute to health and longevity due to the effects of autophagy. According to Healthline.com, “Autophagy is the body’s way of cleaning out damaged cells, in order to regenerate newer, healthier cells”.
Japanese cell biologist Yoshinori Ohsumi in 2016 won the Nobel Prize in Physiology or Medicine for his discoveries in autophagy and its significance in longevity. Today, doctors like Dr. Jason Fung are big proponents of intermittent fasting and highly recommend it for health and weight loss.
No-Carb Meal
The Carnivore or meat-only diet became more widely known when psychologist Jordan Peterson and his daughter Mikhala explained that it was beneficial in helping them overcome depression, anxiety and autoimmune conditions. Although it is controversial and I am not recommending it wholly here, I see nothing wrong with consuming the occasional meal that may only consist of meat.
Locally, we have meat meals as ‘cutters‘ during a lime or an event. Some examples of these are geera chicken, pepper shrimp, souse, curried hard fowl, geera neck, curried crab, fried shark. On occasion, you can try a portion or serving of one of your favourite cutters, preferably not battered in endless flour and deep fried, but use your discretion and enjoy a carbohydrate-free meal with a glass of water. See how it makes you feel. A meal of meat has been shown to be very satiating and staves off hunger for a while.
Add Flavour – Low-Calorie Condiments, Herbs and Spices
I remember once a family member of mine went on a diet. She was miserable for days eating bland boiled vegetables. Eventually, she gave up and went back to heavy calorie-laden unhealthy foods. Based on my observation, the lack of enjoyment of her food caused her to go back to what she enjoyed and was used to. I absolutely love vegetables but I also love my veggies to have flavour.
Herbs and spices we have been blessed with in abundance. There are so many ways to add flavour to food to make it more palatable and therefore more enjoyable. Additions of onions, garlic, cilantro, pimento peppers, curry, paprika, and rosemary, for example, can add interest, and variety and make healthier meals a pleasure to consume.

Another way I found to add enjoyment to food is to have healthy condiments that you like adding to your meals. Many commercial condiments are loaded with oils, sugar, high fructose corn syrup, MSG and other ingredients that may not be desirable or healthy. There are many recipes online to make healthier versions. Local pepper sauce, chutney, garlic sauce, chow chow, homemade ketchup, mustard, mango anchar, kuchela….there are so many options that we can prepare at home. The Naparima Girls’ Cookbook has a nice selection of recipes for local condiments.
Use a Spray Bottle to Disperse Cooking oil
This is a simple tip, but it has made life and cooking so much easier. Instead of risking pouring too much oil into your pot, get a food-grade spray bottle, fill it with your cooking oil and use the sprayer to disperse oil in a manageable way. I recently got this one from Amazon and I have no regrets.
Sometimes just a little film of oil is needed to prevent sticking and this does a great job. This is another great way to save on calories.
Drink More Water
Water is necessary for life – without it, we would die! It has no calories, quenches our thirst (which we sometimes mistake for hunger) and can be served with meals instead of juices and soft drinks. Water may also help to suppress the appetite and contribute to a feeling of fullness.
Occasionally, sparkling water or club soda can be infused with flavour from lime/lemons or even a splash of apple cider vinegar for a refreshing, bubbly, pick-me-up.
Snack on Low Sugar Fruit
Here in the Caribbean, we have access to an abundance of tropical fruit. We also have imported fruit such as apples, strawberries, blueberries etc.
If you like slightly tart fruit, have them as an occasional snack. Plums, pommecythere, portugal, chennette, pommerac, half-ripe mangoes, and cherries are a few options. You can have them plain or whip up a chow and call a friend over. These tend to be lower in calories than a ripe banana, for example.
When you’re in the mood for a little more sweetness, watermelon or pawpaw is a good choice. They have high water content, are lower in calories and can leave you feeling satisfied.
Track Your Calories
One of the most impactful things I have done along my journey is to track my calories. I think every health-conscious person should do it for at least a one-month period just to get an idea of just how calorie-dense everyday foods can be. Also, food trackers, give a macronutrient breakdown so you can have an idea if food is carbohydrate-heavy, low in protein, high in fat etc.
In one study, calorie counting was shown to contribute to ‘significant and sustained weight loss over time‘.
You will not need to count calories forever, but it sure helps to have an idea of what foods you are putting into your body and which may be contributing to weight gain.
Eat High Volume, Low-Calorie Foods
This also falls in line with the popcorn and cucumber tip above, as well as tracking calories. We are not born automatically knowing the calorie content of foods, but when we start tracking foods in a calorie counter we may discover foods that are very low calorie that we can incorporate more of into our daily nutrition.
For example, chorai bhagi, (Amaranthus dubius) also known as local spinach, after being cooked on its own and boiled down like, well bhagi, has approximately 28 calories per cup (this is without cooking oil and coconut milk). So if you were to eat dhal, rice and chorai bhagi, you could afford to have less rice and more bhagi and feel full and satisfied.
Salads rich in greens, cabbage, carrots, cucumbers and tomatoes can be a filling and satisfying addition to any meal to add volume and leave you feeling fuller for longer. Just do not add calorie-dense dressings to your salad.
If man made it, don’t eat it! ~ Jack Lalanne
Avoid Sugar
There is added sugar in many processed foods, not just in juices and soft drinks.
As mentioned earlier, a diet high in sugar can lead to many harmful physical conditions, but it has also been shown to contribute to mental health conditions such as anxiety, depression and mood swings.
Dr. Hu in a Harvard.edu article on the danger of sugar states, “The effects of added sugar intake — higher blood pressure, inflammation, weight gain, diabetes, and fatty liver disease — are all linked to an increased risk for heart attack and stroke,”
Stick to foods found in nature and avoid processed foods as much as possible.
Stop Unnecessary Eating
Sometimes we eat out of boredom or habit. An example is at the movies, buttered popcorn or cheesy nachos are staples for some people while watching a film, whether hungry or not. Or, maybe if at home with nothing to do we may find ourselves rummaging through the fridge or cupboard looking for something to eat. Again, this comes down to being mindful. Is it a genuine hunger or just a craving or impulse based on emotions at the moment?
Tracking your food in an app like MyFitnessPal is a good way to observe your eating patterns. Then you can make a conscious effort to change any bad habits that you may have.
Eat Low Carbohydrate Broths and Soups
Soups and broths are mostly water and require relatively simple preparation. Soups with low to no oils can be satisfying and filling – especially when made with low-carbohydrate, high-fibre vegetables like cabbage, patchoi, pumpkin, carrots, and okra. Add a few pieces of your favourite lean meats or soup bones for added protein, flavour and texture.

For the purpose of losing weight, avoid adding starchy foods such as dumplings, pasta, macaroni, rice, potatoes and provisions to soups. Of course, you can still enjoy these items in your soups on occasion, but for calorie management, leave them out. An example of a good soup for weight loss is Trini fish broth, minus the carbs.
Studies have shown that soup consumption can improve satiety and reduce calorie intake.
So there we have some options that may assist in mindfully eating fewer calories while still maintaining flavour, satiety and enjoyment.
Let me know if you have any weight loss tips to share that work for you.
Disclaimer: This post is for informational purposes only. Readers of this blog should seek medical advice before making any decisions related to nutrition and health.

The post 18 Food Tips for Weight Loss Like Ah Trini appeared first on Like Ah Trini.
]]>The post Homemade Sauerkraut – Fermented Cabbage appeared first on Like Ah Trini.
]]>The word ‘sauerkraut’ itself is a German word that literally translates to ‘sour cabbage’, however, it is believed that it originated with the Chinese who started fermenting cabbage in the 7th century BC.
So esteemed was this early ‘superfood’ known for being rich in vitamin C, that in 1768 Captain James Cook, a British navigator and explorer made certain to take it with him in abundance on his long sea voyage to prevent scurvy among his men.
Before the invention of refrigeration, fermenting fresh foods was a valuable form of preservation to extend shelf-life and reduce food spoilage and wastage. This has been practised for thousands of years among many cultures throughout the world. Today, this has given us foods such as:
- Kimchi from Korea
- Lassi from India (Dahee)
- Miso and Natto from Japan
- Garri from Africa
- Tempeh from Indonesia


In Trinidad and Tobago, other than yoghurt, dahee, which was brought to Trinidad and Tobago by East Indian indentured labourers, is a popular fermented food. There has also been a recent increase in local producers making probiotic drinks such as kombucha and kefir.
As far as I know, Haitian fermented Pikliz is probably the closest Caribbean dish to sauerkraut. It is similar to a blend of pepper sauce and fermented cabbage.
Why Eat Fermented Foods?
Hippocrates, the father of modern medicine is quoted as saying, “all diseases begin in the gut” and many studies are indeed proving that there is a connection between the risk of disease and gut health.
Beneficial bacteria in the gut or intestinal tract contribute greatly to our physical and mental health. They help keep ‘bad’ bacteria in check which have been shown to contribute to anxiety, depression, and overeating leading to obesity, among many other ails.
In addition, our lifestyles have changed so much from natural origins with the consumption of excess sugar and processed food, that the microbiome in the gut is imbalanced in many individuals. Adding fermented foods to our diets can introduce beneficial microbes into the intestinal tract to help keep harmful bacteria in check.
What Is Lacto-Fermentation?
Lacto-fermentation, the process used to make sauerkraut, is the process by which lactic acid bacteria, break down sugar into lactic acid and carbon dioxide.
To make sauerkraut, cabbage is shredded and between 2% to 3% salt (by weight) is added. The salt is squeezed and massaged into the cabbage to allow the cell walls to break for the cabbage to release its natural water. Also by osmosis, the water is drawn out of the cabbage to create a brine.
The salt content of the brine kills harmful microorganisms, while the lactic acid bacteria (mainly lactobacillus species) survive. The lactobacilli, which naturally live on the cabbage leaves, then convert the natural sugars in the cabbage into lactic acid and carbon dioxide. The salt hardens the pectins in the cabbage, giving it its crunchy texture while the acidity preserves it and gives it its tangy flavour. During fermentation, the sauerkraut becomes bubbly as carbon dioxide is created, but this usually stops when the acidity or pH of the sauerkraut reaches 3.5 or less; then the lactobacilli growth is inhibited and fermentation stops.
There are many benefits of sauerkraut;
- It is high in vitamin C, antioxidants and minerals
- It is packed with living probiotics that contribute to healthy digestive flora
- It is high in vitamin K2 that promotes healthy arteries
- It may contribute to weight loss due to being high in fibre and low in calories (27 calories per cup)
- It improves digestion due to a variety of enzymes it contains
- It improves immunity
- There is increased nutrient availability
Personally, I love the crunchy tangy flavour of sauerkraut in sandwiches, salads, burgers, as a side dish with foods like pelau, or sometimes I would just eat a spoonful when I’m feeling for ‘something salt to pass in mih mouth‘.
Typically, sauerkraut is just two ingredients – cabbage and salt – but you know the Trinbagonian in me will want to ‘Trinify’ the recipe. So I add seasonings to my sauerkraut. In the recipe below, I added, shadon beni (culantro), garlic and pimento peppers. This is totally optional as well as you can add your own spices according to your taste.
Salt
As mentioned previously, salt helps to create a favourable environment for the lactic acid bacteria and also prevents the growth of harmful microorganisms. The ideal amount of salt used for fermentation is 2.25% to 2.5% salt by weight or 1 1/2 to 2 teaspoons per pound of cabbage.
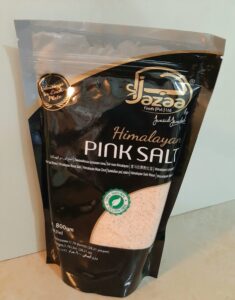
Avoid using salts high in fluoride and iodine as they may inhibit the fermentation process. Opt for unrefined high mineral salts such as pure sea salt or Himalayan pink salt. Also, avoid coarse salt, a finer grade will dissolve better in the brine.
This is the Himalayan pink salt that I used.
Choosing A Cabbage For Sauerkraut
When shopping for cabbage, choose a head that is firm with fresh, crisp leaves, not old or wilted. Good quality cabbage will yield good quality sauerkraut. It is best to seek out one that is free of pesticides or other chemicals.
For this recipe, I used three pounds of green cabbage (this was the weight after chopping and removing the stem).
Equipment
- Cutting board
- Knife
- Kitchen Scale
- Large Mason or Glass Jar
- Fermentation weights ( or marbles, stones)
- Small container (for leaves)
- Large container to mix cabbage
Ingredients
- 3 lbs of cabbage
- 6 tsp salt (sea or pink)
- 5 large shadon beni leaves (culantro)
- 1 head of garlic
- 4 pimento peppers
Directions to Make Sauerkraut
Always start with clean utensils and surfaces.
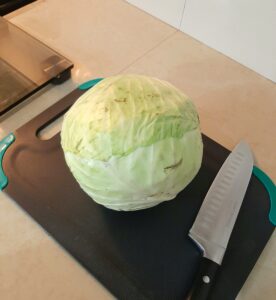
Remove the outer leaves of the cabbage. Rinse them thoroughly under running water and set them aside to drain for use later on.
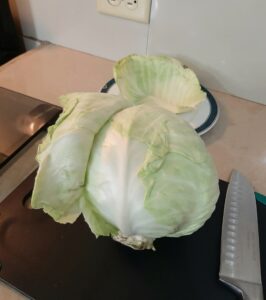
Prepare the cabbage by slicing or shredding. Discard the core (or put it in your next batch of bone broth.)
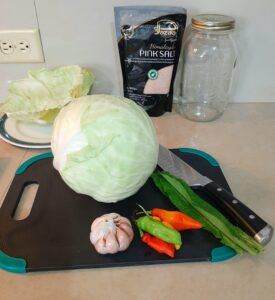
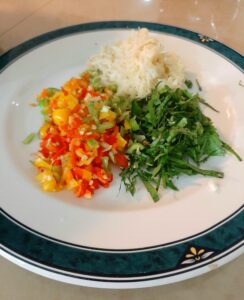
Chop or mince the pimentoes and chadon beni. I finely grated the garlic but it is also an option to chop all the seasonings in a food processor.
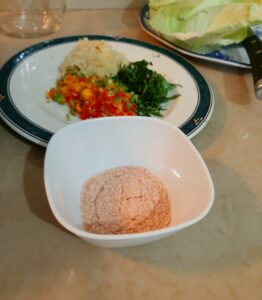
Measure out the salt.
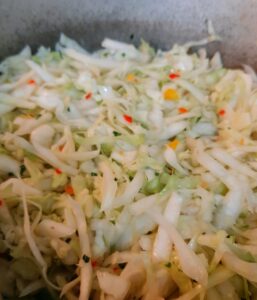
In a large container, add the chopped cabbage, seasonings and salt.

With clean hands, mix all the ingredients together while squeezing and massaging the salt into the cabbage for about 3 minutes. While doing this you want to crush or bruise the pieces of cabbage with your hands to break the cell walls and allow the natural water within to help create a brine. Next, cover it and allow it to rest for about half an hour.
After allowing it to rest, transfer it to a mason or other glass jar and press it down into the jar. Include any liquid that was at the bottom of the mixing container. The brine will rise to the top. Ensure that the solids are fully submerged in the brine.
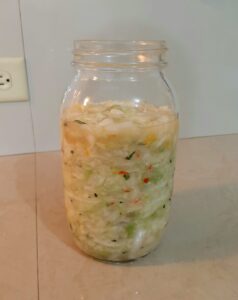
Put the clean reserved cabbage leaves on the top; push them into the brine.
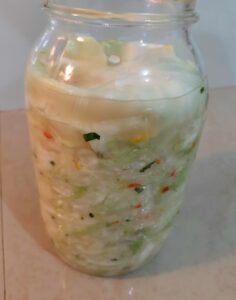
Next, use a weight to ensure that everything is well-submerged.
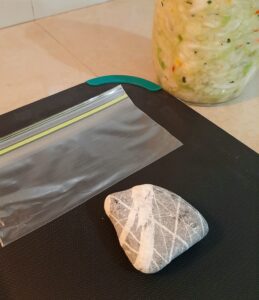
I didn’t have a fermentation weight so I improvised using a clean sanitized river rock in a sealed Ziploc bag.
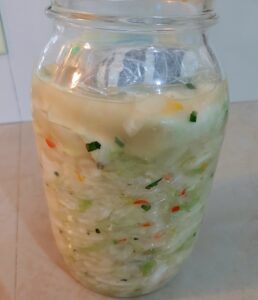
Leave at least 2 inches of head space between the brine and the lid and cover the jar loosely. Put the jar in a container should any of the fermenting brine bubble out. As the carbon dioxide is created during fermentation, bubbles can raise the sauerkraut to the top of the jar.
Store in an area away from direct light and heat, I like to put it in the kitchen cupboard.
Check on it every day. Ensure that the cabbage is submerged under the brine and open the lid to ‘burp’ it once a day to release some of the pressure created by the gas. Replace the lid on it immediately. If you need to use a utensil to push down the sauerkraut to re-submerge it, it is preferable to use a wooden or silicone spoon, avoid using metal.
Taste the sauerkraut as it ferments to find the flavour that you like as it becomes more sour the longer it ferments. I usually start tasting it after 3 days of fermentation. As the temperatures in everyone’s homes vary, fermentation may happen at different rates. For some, day 5 ferment may be the sweet spot, whereas, for others, day 12 might be best.
Once the flavour is where you like it, remove the weight and the cabbage leaves from the top of the sauerkraut, replace the lid and put it in the refrigerator. Fermentation slows down once placed in the fridge.
Sauerkraut kept in the fridge can last from 4 to 6 months. It usually finishes in my home long before that, as we love sauerkraut!
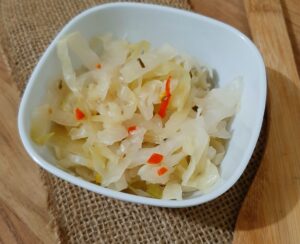
Since my journey into the world of homemade fermented foods, I have since made fermented garlic, cucumbers, carailie, sweet peppers and even fermented pepper sauce. It is a great way to preserve food especially when it is seasonally in abundance and at lower prices in the market. Not to mention all the valuable health benefits.
All-in-all I believe fermenting food at home is a valuable skill to have.
Homemade Sauerkraut
Equipment
- Cutting Board
- Container for leaves
- Knife
- Kitchen Scale
- Large container to mix cabbage
- Large Mason or Glass Jar
- Fermentation Weights or marbles or stones
Ingredients
- 3 lbs Cabbage
- 6 tsp Mineral Salt
- 5 large leaves Shadon Beni (Culantro)
- 1 head Garlic
- 4 whole Pimento Peppers
Instructions
- Remove the outer leaves of the cabbage. Rinse them thoroughly under running water and set them aside to drain for use later on.
- Prepare the cabbage by slicing or shredding. Discard the core (or put it in your next batch of bone broth.)
- Chop or mince the pimentoes and chadon beni. Finely grate the garlic or chop all the seasonings in a food processor.
- Measure out the salt.
- In a large container, add the chopped cabbage, seasonings and salt.
- With clean hands, mix all the ingredients together while squeezing and massaging the salt into the cabbage for about 3 minutes. While doing this you want to crush or bruise the pieces of cabbage with your hands to break the cell walls and allow the natural water within it to help create a brine. Next, cover it and allow it to rest for about half an hour.
- After the rest period, transfer to a mason or other glass jar and press it down into the jar. Be sure to include any liquid that was at the bottom of the mixing container. The brine will rise to the top. Ensure that the solids are fully submerged in the brine.
- Put the clean reserved cabbage leaves on the top; push them into the brine.
- Next, use a weight to ensure that everything is well-submerged. Leave at least 2 inches of head space between the brine and the cover and cover the jar loosely. Put the jar in a container in case any of the fermenting brine should bubble out.
- Store in an area away from direct light and heat.
- Check on it every day. Ensure that the cabbage is submerged under the brine and open the lid to 'burp' it once a day to release some of the pressure created by the gas. Replace the cover on it immediately. If you need to use a utensil to push down the sauerkraut to re-submerge it, it is preferable to use a wooden or silicone spoon.
- Taste it after 3 days of fermentation to find the flavour that you like as it becomes more sour the longer it ferments.
- Once the flavour is where you want it, remove the weight and the cabbage leaves from the top of the sauerkraut, replace the lid and put it in the refrigerator. Fermentation slows down once placed in the fridge. Sauerkraut kept in the fridge can last from 4 to 6 months.
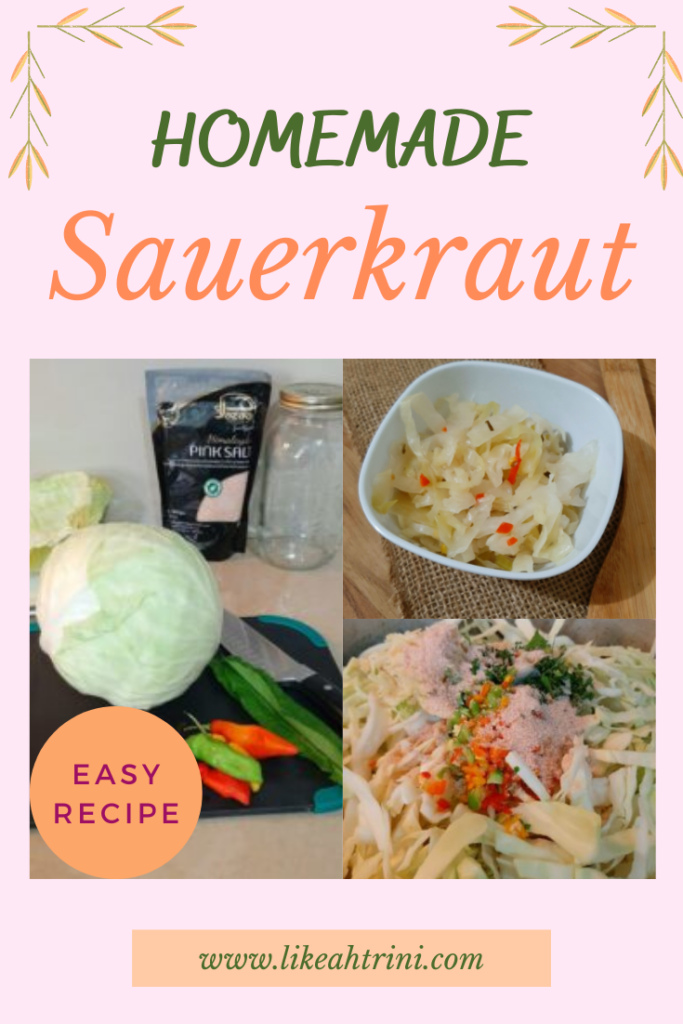
The post Homemade Sauerkraut – Fermented Cabbage appeared first on Like Ah Trini.
]]>The post Homemade Bone Broth appeared first on Like Ah Trini.
]]>Bone broth has been consumed in many cultures across the globe for centuries. In Traditional Chinese Medicine it is believed to improve sleep, help with digestive issues, heal the gut and also have anti-inflammatory properties.
In her book, New York Times Bestseller, Dr. Kellyann’s Bone Broth Diet, Kellyann Petrucci states that, “Bone broth isn’t just broth. And it isn’t just soup. It’s concentrated healing. This broth made from meat, poultry, or fish bones and simmered on the stove for hours until it turns into nutrient-rich ‘liquid gold,’ is one of the world’s oldest and most powerful medicinal foods.” Through her program, she has helped people lose weight and regain energy by adding broth to their daily nutrition.
The base for any bone broth is essentially bones, water and vinegar. Vegetables, herbs and spices are added for additional nutrition and flavour.
This can be a frugal way to use up bones leftover from previous meals and excess vegetables can be included as well. Chicken feet, back and neck, pig feet, turkey, lamb, and even fish bones can make a hearty broth. I personally prefer chicken feet, beef bones or cow heels when I make bone broth.

For this recipe, I used cow heel or cow foot as it is called in other parts of the Caribbean. It is a popular ingredient, especially in soups and it is widely available in supermarkets across the nation. Cow heel is rich in cartilage which breaks down to gelatin and amino acids when cooked. Apple cider vinegar is also added to the cooking process to dissolve valuable minerals in the bones.
Fresh turmeric root (Haldi) was included in my recipe for added benefits but you can add the powder or leave it out completely. Experiment with different spices and herbs and make it your own.
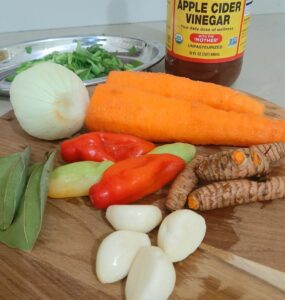
It is best to cook the broth low and slow. Some people cook it for between 24 and 48 hours.

Caribbean Cow Heel Bone Broth
Equipment
- Slow Cooker (4 quarts or larger)
Ingredients
- 3 lbs Cow Heel
- 10 cups Water
- 2 medium Carrots
- 1 large Onion
- 2 tbsp Apple Cider Vinegar
- 4 whole Pimento Peppers
- 4 cloves Garlic
- 2 tbsp Turmeric Root
- 1 tbsp Cilantro
- 1 tbsp Chives
- 1 sprig Oregano
- 2 dried Bay Leaves
- 1 tsp Salt or to taste
- 1 dash Black Pepper or to taste
Instructions
- Add the cow heel to the slow cooker.
- Roughly chop the carrots, onion, pimento peppers, garlic, turmeric root, chives and cilantro. Add to the slow cooker.

- Add the water, bay leaves, sprig of oregano, apple cider vinegar, salt and black pepper.
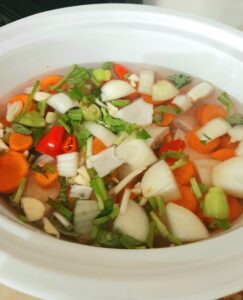
- Cover the slow cooker and allow the bones to simmer for at least 14 hours.
- When cooking is finished, adjust for salt then carefully strain the broth through a mesh strainer to remove the solids.

- Pour into a bowl or mug and enjoy immediately or allow it to cool fully before storing in the refrigerator for up to 4 days or up to 2 months in the freezer.
- Note that when the broth is chilled, it becomes gelatinous due to the collagen. The fat sits at the top and can be easily removed, if you prefer.
- Other than enjoying this broth on its own, it can be added to soups, sauces, stews and gravies.

The post Homemade Bone Broth appeared first on Like Ah Trini.
]]>The post My Favourite Caribbean Cookbooks appeared first on Like Ah Trini.
]]>From pelau to dhal puri, fried rice, buljol, oildown and everything in between, I absolutely love the traditional foods of my twin island home – a fusion of cultures that has evolved to create a gustatory experience that is all our own.
Back in the day, I used to enjoy going to the Chaguanas market on a weekend with my Mum to purchase fresh fruits, vegetables, provision, meat and fish. Then we would come home to grind up fresh green seasoning for the week and make some hot pepper sauce on the side. What we did not buy at the market we had growing in our kitchen garden in the back yard. Not to mention, that when times were lean, we could always count on the abundance of dasheen (taro) and dasheen bush that grew in the yard. Food in its pure, organic state, straight from nature’s bounty. The things we take for granted, eh!

I have a great appreciation for the times in which we live now where we have access to online video tutorials that show exactly how the food is prepared and the different styles and methods of preparation.
Some of my personal favourites are Trini Cooking with Natasha, Caribbean Pot with Chris De la Rosa, Foodie Nation – especially Uncle Clyde from Paramin and Ms. Shanty.
I have to give credit to Natasha for teaching me how to make sada roti. (Once upon a time you would have thought I was trying to make homemade Crix.)
Over the years, I’ve collected many recipes and recipe books, some of which I’ve since passed on to family members but there are a few favourites that have been on my culinary bookshelf that are near and dear to me. Here are the books that have been valuable in helping me cook authentic Trinbagonian meals as well as dishes from other islands in the Caribbean and the world.
The Multi-Cultural Cuisine of Trinidad and Tobago & The Caribbean – Naparima Girls’ High School Cookbook
The Naparima Girls’ Cookbook has to be the most popular recipe book in Trinidad and Tobago, a household staple. For many years I had the original pink and white 1988 edition before I purchased my copy of the 2002 second edition.
The variety of dishes in this book is excellent! Chinese, Indian, Creole, Middle Eastern, cuisines of other countries and almost every snack and delicacy related to the many religious and cultural holidays we have here in sweet T&T.
I particularly love the Christmas recipes such as Pastelle, Trinidad Black Cake, Ginger Beer, Ponche de Creme, Sorrel Drink, and even homemade Chow Chow.
The second edition, containing over 500 recipes, is well-organized and has nutrition information, calories per serving, etc. which I always appreciate in a cookbook.
This is one book that I will definitely save to pass on to my children.
Curry, Callaloo and Calypso – Wendy Rahamut
I used to look forward to watching Wendy Rahamut on Caribbean Flavours, back in the day. I admired how she would ‘incorporate’ the ingredients and I learned different kitchen techniques from her. Although I have her other cookbook, Quick Fixin’ Recipes, I have a preference for Curry, Callaloo & Calypso – The Real Taste of Trinidad and Tobago.
Almost every Trinbagonian dish that could be listed off the top of your head, there is a recipe on how to prepare it. It has a good mix of Indian and Creole dishes, Soups, Beverages and a wide array of delicacies. Toolum, tamarind balls, barfi, coconut ice cream – those were the real treats in my childhood – all these are featured as well.
I think that this book is good for a novice cook or even a bachelor trying his hand at cooking. Simple recipes such as fried plantain, cheese paste sandwiches or even macaroni pie remove much of the intimidation with straightforward ingredients and easy-to-follow directions.
The quality of the photography and information in the book is fabulous, in my opinion.
An Adventure in Caribbean Cuisine – Caribbean Association of Home Economists
This is a gem of a cookbook particularly if you enjoy trying new recipes. The dishes showcase the medley of flavours that make up the kaleidoscope of Caribbean cuisine. From Anguilla to Jamaica, Trinidad and Tobago, and St Vincent and the Grenadines, here are some of the offerings:
- Farine pie – Guyana
- Pickled Breadnut – St. Lucia
- Bul Jol – Trinidad and Tobago
- Nasi Goreng – Suriname
- Ackee and Saltfish – Jamaica
One of my favourite aspects of this book is that nutrition information is included with each recipe detailing the number of servings, calories per recipe and per serving as well as macronutrient content – protein, carbohydrates, fats etc.
In part 2 of the book, there is a section on ‘Flavour aids’, which serves to educate the home cook on the uses and benefits of herbs and spices such as Allspice, Bayleaf, Clove, Garlic, Nutmeg etc as well as the exotic fruits and vegetables of the Caribbean.
Caribbean Food Made Easy with Levi Roots
Jamaican-born Levi Roots shares his love of cooking, inspired by his beloved grandmother, in his brilliant cookbook, Caribbean Food Made Easy.
Through his recipes, he encourages you to, “Seek out the wonderful foods and flavours of the Caribbean and explore the islands from your kitchen!”
Some of my favourite recipes from his book are, Sweet Lime and Angostura Bitters Chicken Bits, Saucy Plantain, Tamarind and Molasses Roast Chicken, Spicy Mackerel with Green Bananas and Caribbean Porridge.
This book features the following sections:
- One Pot and Suppers
- Fish and Seafood
- Roasts and Grills
- On the Side
- Beach and Street Food
- Desserts and Drinks
- Stocks.
Celebrate Food! – Naparima Girls’ High School Centenary Cookbook 1912-2012
“Cooking is like love – it should be entered into with abandon or not at all.”~ Harriet Van Horne
Celebrate Food! was created to commemorate the 100th Anniversary of the Naparima Girls’ High school. The recipes in this book are meant to encourage readers to try more ‘exotic dishes’.
Some of the more common local dishes in this cookbook are Pepper Roti, Stewed Red Beans, Curry Stew Chicken, Pineapple Mango Chow, and ‘Limers’ Corn Soup with Dumplings. There are also many recipes that are not typically Caribbean such as Greek Salad, Jerk Chicken Enchiladas, Moroccan Lamb Skewers with Tahini Yogurt and Sushi.
The editors of the book explain that “‘Celebrate Food!’ is an exploration of world cuisine and fusion cooking that showcases recipes that are not only culturally diverse but many of which are quick and easy to prepare.”
Recipes are categorized into:
- Appealing Appetizers
- Exciting Entrees
- Scrumptious Sides
- Delectable Desserts
- Blissful Beverages
The book has beautiful photography, information on preparation and cook times as well as a section on herbs, spices and napkin folds. I definitely recommend this book especially to experiment with cuisines outside of our region.
Feel free to share, what cookbooks are your favourite?

The post My Favourite Caribbean Cookbooks appeared first on Like Ah Trini.
]]>The post How To Create A Cleaning Schedule appeared first on Like Ah Trini.
]]>Every Saturday morning, my grandparents would be up bright and early. By 6 am Pappy, dressed in his yard clothes was outside cutting grass with a cutlass while Granny was cooking stewed chicken and rice for lunch – some of that delicious stew we would have with hot homemade bread for breakfast. After, breakfast and washing up, it was time for the weekly chores.
The windows and curtains were opened to invite in the fresh morning air and brilliant sunbeams. The minute we opened the eastern bedroom windows there were the neighbours, the two kindly older ladies that lived next to us, ‘sending right’ (waving) with the usual courtesies, “Mawnin neighbs!”. One was sweeping their upstairs gallery and the other was out by the front lawn tending to their gorgeous, well-kept rose garden.
Across the road, uncle Robert was just starting up his lawn mower and the air already smelled of freshly cut grass. Everybody was up and about!
There was so much vibrant energy around and everyone in the neighbourhood was doing their part. Ah, the good old days!

Although Saturdays saw the family coming together to do the majority of the deep cleaning, my grandparents both had daily cleaning and tidying rituals built into their routines that helped to keep the home orderly and visitor-ready. I always admired this.
Unfortunately, by the time I was old enough to really appreciate the amount of care and consideration that went into their love of taking care of the home, they were both well into the autumn of their years. I would have loved to learn much more from them.
I have fond memories of cleaning with my grandparents growing up as a very young child. Helping Granny ‘dust the chairs’ and helping Pappy sweep up the guava leaves in the yard with a cocoyea broom.
Life has changed so much since then!
Now we live in a fast world – fast food, fast entertainment, emails, social media, and just well…. busyness! Along the way we have lost track of so many aspects of ourselves, our homes are being neglected, our diets have changed from nutritious wholesome food to convenience foods laden with chemicals, exercise is a trip from the bedroom to the kitchen (hardly anyone even walks to the mailbox anymore) and on and on.
Not to mention, we moms have lots on our plates, taking care of our children and families, and some of us working to bring in an income as well. It can all be so exhausting. How can we get it all done?
The truth is we can’t do everything, but we can prioritise and do what is important – little by little, step by step and we will get there.
One aspect that I know a lot of moms struggle with is keeping the home clean.
The Importance of A Clean Environment
Jordan Peterson, Canadian psychologist, professor and author of 12 Rules For Life, An Antidote to Chaos, one of his biggest pieces of advice for an improved sense of mental well-being, is to ‘clean your room’. How true this is!
Our environment is an extension of ourselves and it affects our energy on multiple levels. In my own experience, a cluttered room or a sink overflowing with dirty dishes causes me anxiety.
Studies done over the years have shown that living in a cluttered, dirty and disorganized environment can lead to depression, fatigue, lack of focus and a decline in health.
Especially now in the times in which we live, where hygiene and cleanliness are emphasized to prevent the spreading of harmful germs, viruses and bacteria, it is important to keep our homes clean. It also helps to prevent vermin such as rats and cockroaches who may be looking for the perfect environment to raise their families.
Out of so many other factors in life that we may have little control over, the cleanliness of our home is one thing that we can control.
So how do we make progress toward a more organized, tidier home without feeling overwhelmed? Follow a cleaning schedule.
What is a Cleaning Schedule and Why Should You Have One?
A cleaning schedule is a written plan to accomplish cleaning tasks that need to be completed to achieve a level of cleanliness.
It is beneficial to have a cleaning schedule to:
- Reduce stress associated with cleaning
- Organize tasks by frequency – daily, weekly, monthly, seasonally etc.
- Eliminate decision fatigue and confusion
- Maintain order around the home
- Make tasks quick and efficient if you know what comes next and what it entails
- Get family on board where everyone knows their duty
The main key to creating a cleaning schedule is to make it realistic for you and your family.
How to Create A Cleaning Schedule
Divide Each Room into Areas or Components
The first step is to identify the individual rooms/spaces that need to be cleaned and maintained.
Start with your first room, let’s use the washroom as an example. Do a walk-through of the area and also take a picture to examine the different components of the room that require cleaning.
The washroom could be divided into the shower stall, toilet, sink, countertop, mirror and floor depending on your layout. Identify then write down each area to be cleaned.

Determine How Often Each Part Needs to Be Cleaned – Frequency
For example, the shower stall and mirror could be cleaned once a week, while the toilet, sink and counter may need daily cleaning.
Your initial list may look something like this:

Create A Master List of Tasks
Here is a simple template that you can use to get you started creating your schedule.
Make your master list detailing all the tasks that need to be carried out in each room, and how often they should be done to achieve a standard of cleanliness.
Assign Days and Times To Family Members to Complete Tasks
If you have family members who can and are willing to assist and do their part in keeping the home tidy, communicate with them about the new cleaning schedule and assign tasks to them to help with the upkeep of the home. As well, if you are single or a single parent with young children, space out the chores in a way that is suitable and realistic to you to avoid burnout and overwhelm. We’re just doing our best out here.

Make a note of the assigned tasks and post it somewhere in the home that everyone has access to see who has what chores/tasks to do on which day.
Make a List of Cleaning Supplies and Tools that Will be Needed
Different areas of the home may require different cleaning agents and tools. Make a list of the items you would need to get the job done. Mop, broom, dustpan, buckets, sponges, all-purpose cleaner, cleaning cloths, dishwashing liquid, disinfectant etc. You don’t have to go on a shopping spree but just ensure that you have the basics on hand.
Create Index Card System
I have found that the Index Card system is a very valuable part of the cleaning scheduling process.
Essentially, this is where the daily tasks for each room are written on an index card and placed somewhere safe in the room to be cleaned. These tasks are more of a quick spruce up and not a deep clean and should fit into a fifteen-minute time block.
Anytime I am ready to do a quick 15-minute clean in the bathroom, for example, I grab my supplies, the index card telling me exactly what needs to be done, I set my timer and go for it! By the time, I’m done the bathroom is sparkling! For me, trying to beat the timer adds to the motivation to get it finished!
Get an index card for each room and write the daily tasks for that room on it. Place it in an area of the room where it would be safe and dry, such as in a drawer or pinned to a pegboard but where you would have easy access to it. When it is time to clean, gather your cleaning tools, set a timer for 15 minutes and see if you can complete the daily tasks within the time.
Every time you need to clean a particular room, your checklist is always handy on an index card nearby. No hassle, no worries, just follow what’s on the card!
Try Out Your New Cleaning Schedule and Improve as You Go Along
Now it’s time to implement the cleaning schedule. Bring the family on board and test it out for a week. Some family members may want to switch up tasks or offer suggestions to get things done more efficiently.
You yourself may realize that some tasks should be done before others and the order should be changed. For example, you may find that you can put the toilet bowl cleaner in the toilet first and let it work while you clean the sink and the countertop in the washroom.
Most of all have fun with it!
Here are a few tips to make cleaning easier and more pleasant:
- Listen to your favourite music while you clean –, jazz, soca, techno, pop – whatever gets your energy up. Also, you can press play on your favourite audiobook or podcast.
- Put your favourite essential oil in a diffuser or light some incense, or use the old-fashioned way of boiling cinnamon and orange peel on the stove.
- Use a timer – make it fun among family members to complete their chores before time runs out.
- Use a caddy to carry around your cleaning tools and also place cleaning items in areas where they can be easily accessed to avoid delays when running from one room to another. For example, store the multipurpose cleaner for the bathroom under the bathroom sink rather than in the kitchen.
- Do two-minute tasks – on days when you feel overwhelmed or can’t find time to get everything done, simply do small two-minute tasks to help move the needle. Little by little you will get there.
Forget about perfection!
Just do your best. If you missed a spot today, you will get it tomorrow.
Keep at it and eventually, you will memorize the steps to clean a room and it becomes a habit. Next thing you know, much of the stress is gone and keeping a (mostly) tidy home is part of the norm.
What about you? Do you have any cleaning and tidying tips to share?
The post How To Create A Cleaning Schedule appeared first on Like Ah Trini.
]]>


